Friday, November 20, 2020

Chamomile


Chamomile

ka·mu·mail ; Chamaemelum mobile / Matricaria recutita 


Days from Seed to Maturity: 42-56

Lifespan: Chamaemelum mobile (English, Russian or Roman Chamomile) are perennials. 

Matricaria recutita (German) is an annual. 

"Chamaemelum mobile, also commonly known as English, Russian, or Roman chamomile, is a low growing perennial. It is considered to be the true chamomile and is used in landscapes as a flowering groundcover or lawn substitute. English chamomile is hardy in zones 4-11 and is cultivated all over the world for its herbal properties. German chamomile, or Matricaria recutita, is also cultivated as the herb chamomile, but it is considered the false chamomile. It is an annual that grows to 18 inches (46 cm.) tall and its consistent miniature daisy-like flowers add charm to container, herb, and cottage gardens."

Read more at Gardening Know How: Chamomile Seed Info: How And When To Plant Chamomile Seeds https://www.gardeningknowhow.com/edible/herbs/chamomile/planting-chamomile-seeds.htm

Outdoor Planting Zones: 3-9

Pruning: After flowering.

Light: Full sun.

Soil: Dry nutrient rich soil. Neutral pH.

Indoor Planting: In a planter 18 inches wide and 8 inches deep.

Water: When the top 2 inches of soil is dry.

Food: Feed with a basic Water Soluble All Purpose Plant Food, such as Miracle-Gro, that has a NPK of 24-8-6, or your favorite well balanced fertilizer. Fertilize indoor plants per the directions accompanying your fertilizer of choice. 

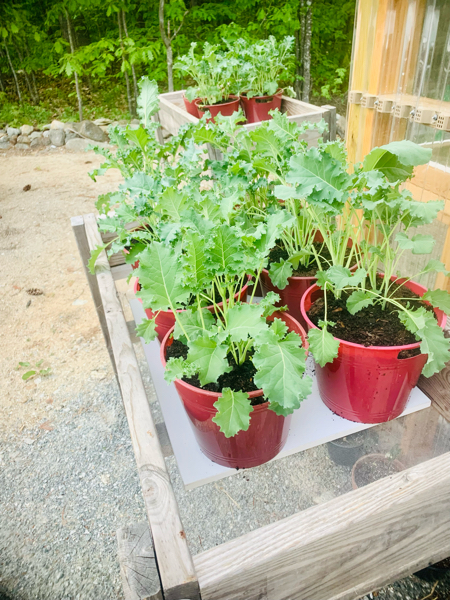
Potential Companions: Mint, Basil, Cabbage, Onions, Beans, Cucumbers, Broccoli, Kale, Brussel Sprouts, Cauliflower, Bee Balm, Phlox, Black Eyed Susan, Lungwort, Astilbe, Bleeding Heart,Delphinium,Roses, Lilacs, Ninebark and Dogwood.

Do not plant with: Plants that require moist soil 

Additional information: Chamomile symbolizes patience in adversity.

Additional Links and Resources:


Please feel free to contact us at LittleLakeviewConservatory@gmail.com be added to our email list or with any questions, requests and comments.

Little Lakeview Conservatory, LLC * Grow a little!


Oregano

Oregano

Un·reh·guh·now; Origanum vulgare


Days from Seed to Maturity: 80-90

Lifespan: Perennial, 5-6 years.

Outdoor Planting Zones: 5-10

Pruning: After the plant reaches 4 inches.

Light: Full sun.

Soil: Well drained, pH between 6.5-7.0

Indoor Planting: Planters 6-12 inches deep, 12 inch width.

Water: Water when soil is dry to the touch.

Food: Feed with a basic Water Soluble All Purpose Plant Food, such as Miracle-Gro,
that has a NPK of 24-8-6, or your favorite well balanced fertilizer. Fertilize indoor 
plants per the directions accompanying your fertilizer of choice. 

Potential Companions: Basil, Chives, Parsley, Marjoram, Rosemary, Sage, Savory, Thyme, 
Cabbage, Asparagus, Carrots, Corn, Onions and Tomatoes. 

Do not plant with: A plant that needs a moist soil.

Additional information: Oregano symbolizes substance.

Additional Links and Resources:


Please feel free to contact us at LittleLakeviewConservatory@gmail.com be added to our email list or with any questions, requests and comments.

Little Lakeview Conservatory, LLC * Grow a little!


Black Gem Dwarf Aloe

Black Gem Dwarf Aloe


Days from Seed to Maturity: 3 years

Lifespan: 12 years

Outdoor Planting Zones: 10-11

Pruning: Trim off dead leaves.

Light: Full sun. 

Soil: Dry soil.

Indoor Planting: Plant prefer temperatures of 70-80 degrees.

Water: Let soil dry thoroughly between waterings.

Food: Feed with a basic Water Soluble All Purpose Plant Food, such as Miracle-Gro, that has a NPK of 24-8-6, or your favorite well balanced fertilizer. Fertilize indoor plants per the directions accompanying your fertilizer of choice. 

Potential Companions: Strawberries, sow thistle, onions, balm of gilead, scented geraniums, elderberry and borage. 

Do not plant with: Anything that requires high moisture in the soil.

Additional information: The plant becomes darker and redder the more sun it gets. 

Additional Links and Resources:


Please feel free to contact us at LittleLakeviewConservatory@gmail.com be added to our email list or with any questions, requests and comments.

Little Lakeview Conservatory, LLC * Grow a little!


Kale

Kale

Days from Seed to Maturity: 70-80


Lifespan: 2 yrs.


Outdoor Planting Zones: 8-10


Pruning: "On a Kale plant, this is the central portion of the plant where the stems converge and new growth emerges. To allow new growth, cut the stems above the growth point. To do this, cut just below wher ethe stem connects to the larger leaves. This will leave the smaller ones intact so the plant can continue growing." -https://gardenerspath.com/plants/vegetables/harvest-kale/


Light: Full Sun 

Soil: Moist, compost rich.


Indoor Planting: Place in a sunny window or under grow lights 8 hrs.


Water: Regular watering to keep soil moist.


Food: Feed with a basic Water Soluble All Purpose Plant Food, such as Miracle-Gro, that has a NPK of 24-8-6, or your favorite well balanced fertilizer. Fertilize indoor plants per the directions accompanying your fertilizer of choice. 


Potential Companions: Beets, Celery, cucumbers, dill, garlic, hyssop, lettuce, mint, nasturtium, onions, garlic, nasturtium, potatoes, rosemary, sage and thyme. 


Do not plant with: Tomatoes or strawberries.


Additional information: Kale is a great winter plant. 


Additional Links and Resources:


https://www.gardeningknowhow.com/edible/vegetables/vgen/companion-vegetable-garden.htm


https://plantcaretoday.com/27-plants-dont-like-mix.html


https://www.almanac.com/plant/kale


Little Lakeview Conservatory, LLC


Please feel free to contact us at LittleLakeviewConservatory@gmail.com be added to our email list or with any questions, requests and comments.


Little Lakeview Conservatory, LLC * Grow a little!


Friday, October 2, 2020

Basil

Basil

Bezel; Osimum Basilicum

Days from Seed to Maturity:50-60

Lifespan: Most Basil, such as the common Sweet Basil, are Annual plants lasting 4-6 mths.

There are also some varieties of Basil that are Perennial, they can grow year round in the right conditions and the plant can come back every year, their leaves are smaller and the plants are bushier.

Outdoor Planting Zones: 5-10

Pruning: Basil should be 6 inches tall before pruning. Trim Basil leaves from the top of the plant. Leave the small leaves below the trimmed basil to allow them to grow.

Light: Direct Sunlight. 6 hrs/day in a sunny location or 10 hrs/day under fluorescent lighting.

Soil: Well drained, Moist. Slightly acidic to neutral pH.

Indoor Planting: If planted in a planter, soil at least 4 inches deep.

Water: Water every 1-2 days. Keep moist, well drained soil. Avoid watering the leaves. 

Food: Feed with a basic Water Soluble All Purpose Plant Food, such as Miracle-Gro, that has a NPK of 24-8-6, or your favorite well balanced fertilizer. Fertilize indoor plants per the directions accompanying your fertilizer of choice. 

Potential Companions: Basil grows well with Tomatoes, Parsley, Chamomile, Lettuce, Peppers, Borage, Marjoram, Oregano, Eggplants, Beans, Asparagus, Cabbage, Beets and Potatoes.

Do not plant with: Sage, Mint, Rue and Rosemary. 

Additional information: Basil repels Hornworms from Tomatoes when planted together.

Additional Links and Resources:


Please feel free to contact us at LittleLakeviewConservatory@gmail.com be added to our email list or with any questions, requests and comments.

Little Lakeview Conservatory, LLC * Grow a little!


Lemon balm

 Lemon balm

lemen ba:m ; Melissa Officianalis


Days from Seed to Maturity: 70

Lifespan: Lemon balm is a perennial plant.

Outdoor Planting Zones: 4-9 cold hardy, but sensitive to heat.

Pruning: Prune after flowering. Avoid cutting more than 1/3 of the plant\"s height. 

Light: Direct sunlight to shade. Lemon balm can thrive under the shade of a companion plant.

Soil: Well drained soil. Slightly alkaline pH 6.7-7.3.

Indoor Planting: If planted in a planter, soil at least 6-8 inches deep.

Water: Water only when the top two inches of the soil is dry. Keep well drained soil.

Food: Feed with a basic Water Soluble All Purpose Plant Food, such as Miracle-Gro, that has a NPK of 24-8-6, or your favorite well balanced fertilizer. Fertilize indoor plants per the directions accompanying your fertilizer of choice. 

Potential Companions: Squash, Melons, Tomatoes, Kale, Apples, Kiwi, Funnel, Onions, Basil, Broccoli, Cauliflower, Cabbage, Hollyhocks, Angelica and Nasturtiums.

Do not plant with: Lemon balm can be planted as a companion to nearly any plant with similar care requirements, although lemon balm has a tendency to take over a small space quickly through its quickly expanding root system.

Additional information: Lemon balm masks the smell of cabbage, repels some insects and attracts honey bees.

Additional Links and Resources:


Please feel free to contact us at LittleLakeviewConservatory@gmail.com be added to our email list or with any questions, requests and comments.

Little Lakeview Conservatory, LLC * Grow a little!


Lavender

la·vuhn·dr ; Lavandula


 Days from Seed to Maturity: 90-200


Lifespan: Lavender is a Perennial plant.

Outdoor Planting Zones: 5-9

Pruning: Prune after Flowering. Avoid cutting more than 1/3 of the stem length.

Light: Direct Sunlight. 6 hrs/day in a sunny location or 10 hrs/day under fluorescent lighting.

Soil: Well drained soil. Slightly Alkaline soil with a pH between 6.7-7.3.

Indoor Planting: If planted in a planter, soil at least 8-10 inches deep.

Water: Water only when the top two inches of the soil is dry. Keep well drained soil.

Food: Feed with a basic Water Soluble All Purpose Plant Food, such as Miracle-Gro, that has a NPK of 24-8-6, or your favorite well balanced fertilizer. Fertilize indoor plants per the directions accompanying your fertilizer of choice. 

Potential Companions: Rosemary, Sage, Thyme, Roses and Bearded Iris.

Do not plant with: Vegetables, due to the moisture value in the soil that most vegetables require.

Additional information: Lavender is in the Mint Family.

Additional Links and Resources:


Please feel free to contact us at LittleLakeviewConservatory@gmail.com be added to our email list or with any questions, requests and comments.


Little Lakeview Conservatory, LLC * Grow a little!


Saturday, July 18, 2020

Making Sea Glass

Making Sea Glass

Little Lakeview Conservatory LLC made its first Sea Glass this year, June 2020. Here is how we made our Sea Glass out of recycled glass bottles:


Little Lakeview Conservatory LLC started making its Sea Glass for use with our hydroponics and aquaponics, as a growing media. Our location has currently been under construction and I have been using this time to try different methods for plant projects.  

I had thrown some turtle vine cuttings into the sea glass bucket while tending the plants and forgotten them. They all rooted. 


 What Little Lakeview Conservatory LLC used to make Sea Glass:

  • Glass bottles, jars or other glass items 
  • Sand
  • Salt
  • Safety Glasses and Gloves
  • A Hammer
  • 5 gallon bucket and Colander. 
  • Water, We used the garden hose.
  • A Rock Tumbler, but in this case a Cement mixer for large batches.

How Little Lakeview Conservatory LLC made our Sea Glass:
  • To start we collected all the items and prepped in proper safety gear to protect against sharp glass. Also the cement mixer was locked in the Garage to protect children and animals from getting hurt during the process, as well as being supervised. 
  • After collecting glass bottles, jars and misc. broken glass items, the collected glass was smashed with a hammer into small pieces.
  • Those pieces of broken glass, roughly a 1/2 full 5 gallon bucket for a batch, were placed into the cement mixer.
  • About a gallon of sand, we grabbed sand from our property, was added to the cement mixer mix.
  • About 4 cups of salt, regular table salt, was added to the cement mixer mix.
  • Then water was sprayed into the mix with the hose to make a slushy mix. 
  • Turned on the cement mixer and let it run in the locked garage, supervised, for a few hours during the day while tending the gardens and doing everyday tasks.
  • Afterwards the mixed mix was poured into the 5 gallon bucket again and with the hose water and the colander the new formed seaglass was cleaned of sand and salt.


All DIY projects shown on LittleLakeviewConservatory.com are purely “at your own risk”. As with any DIY project, unfamiliarity with the tools and process can be dangerous. Posts should be construed as theoretical advice only.
If you are at all uncomfortable or inexperienced working on these projects (especially but not limited to electronics and mechanical), please reconsider doing the job yourself. It is very possible on any DIY project to damage your cottage, void your property insurance, create a hazardous condition, or harm or even kill yourself or others.

Little Lakeview Conservatory LLC will not be held responsible for any injury due to any featured DIY project.


Please feel free to contact us at LittleLakeviewConservatory@gmail.com be added to our email list or with any questions, requests and comments.

Little Lakeview 
Conservatory, LLC * Grow a little!


Sunday, March 29, 2020

Baking Bread

Baking Bread


During this hectic time, Little Lakeview Conservatory LLC is getting back to basics by making a few items that have noticeably been missing from the grocery store shelves lately. Here is the recipe for making this bread. You can add in your favorite herbs or cheese when baking. As Little Lakeview Conservatory LLC won't be able to sell our herbs at the local Farmer's Market, we had an abundance of fresh herbs to add to our recipe today, including oregano and savory.

What you will need:

  • An Oven 
  • (2) 9x5 inch baking pans
  • Mixing Bowls
  • Measuring Cups and Spoons
  • A wet cloth 
  • 5-6 cups of Flour
  • 2 cups of warm water (110 degrees F)
  • 1/2 cup of white sugar
  • 1 1/2 Tbsp of active dry yeast 
  • 1 1/2 Tsp of Salt
  • Herbs 1-2 Tbsp or to taste
  • 1/4 cup vegetable oil 
  • additional oil for preparing pans


How to:

  • In a large bowl mix sugar and water and yeast. 
  • Wait 5 min.
  • Mix salt, herbs and oil into mixture.
  • Mix in flour one cup at a time until all is added.
  • Roll into a ball and place in a large oiled bowl with a wet cloth over it until the dough has doubled in size (approximately an hour) at room temperature. 


  • Grease baking pans.
  • Knead the dough down for about a minute, separate into two balls and place each ball into a greased baking pan.
  • Preheat oven to 350.
  • Let the dough in the pans rise until it is one inch over the pan. 


  • Bake for 30 minutes at 350.
  • Let cool and enjoy!


For a recipe to make your own wild yeast visit https://www.littlelakeviewconservatory.com/2020/03/yeast.html

All DIY projects shown on LittleLakeviewConservatory.com are purely "at your own risk". As with any DIY project, unfamiliarity with the tools and process can be dangerous. Posts should be construed as theoretical advice only. 
If you are at all uncomfortable or inexperienced working on these projects (especially but not limited to electronics and mechanical), please reconsider doing the job yourself. It is very possible on any DIY project to damage your cottage, void your property insurance, create a hazardous condition or harm or even kill yourself or others.

Little Lakeview Conservatory LLC will not be held responsible for any injury due to any featured DIY project.


Please feel free to contact us at LittleLakeviewConservatory@gmail.com be added to our email list or with any questions, requests and comments.

Little Lakeview Conservatory, LLC * Grow a little!


Yeast

Wild Yeast Sourdough Starter Recipe:


Looking to buy bread at the grocery store, and seeing it was sold out at the time, I next moved on to looking for yeast. Thinking well I'll just make bread myself, and the yeast was sold out! After a few shopping trips at multiple stores I did indeed find yeast and eventually bread, but I was then inspired to start my own yeast to have on hand as well. An abundance of herbs and the cool spring weather fuelled the desire to bake as well.

What you need:
  • Pineapple juice
  • Flour
  • Water
  • Mason Jar 
How to:
  1. Keeping at room temperature, Mix 2 tbsp of Pineapple Juice and 3 Tbsp Flour in a Mason Jar.
  2. Stir the mixture 3 times in 24 hrs.
  3. After 24hrs, add 3 Tbsp of Flour and 2 Tbsp of water.
  4. Stir the mixture 3 times in 24 hrs.
  5. Repeat steps 3 and 4 for 5 days. Yeast should start forming after that, creating bubbling.
Ongoing Maintenance:
  • Discard half, use in a recipe.
  • If you plan on using a lot of yeast you can leave it at room temperature to grow faster while feeding it daily/or you may keep it in the fridge, feeding once weekly to make about enough for weekly use.
  • ...And to Feed:
    • After discarding half of the mixture, fill mixture amount back with equal amounts in weight of water and flour(2 parts water and 3 parts flour). Place the mixture in the fridge. 
  • If your mixture starts to have an unpleasant smell or shows growth of mold, toss immediately and start again new.
  • If your mixture accumulates access liquid, poor the excess liquid out and add more flour to feed it in the future.
  • If you are going to substitute dry yeast in a recipe for your wild yeast sourdough starter: Substitute 1 cup of starter for a package of dry yeast, then subtract 1/2 a cup of water and 3/4 cup of flour from your recipe. 

All DIY projects shown on LittleLakeviewConservatory.com are purely "at your own risk". As with any DIY project, unfamiliarity with the tools and process can be dangerous. Posts should be construed as theoretical advice only. 
If you are at all uncomfortable or inexperienced working on these projects (especially but not limited to electronics and mechanical), please reconsider doing the job yourself. It is very possible on any DIY project to damage your cottage, void your property insurance, create a hazardous condition or harm or even kill yourself or others.

Little Lakeview Conservatory LLC will not be held responsible for any injury due to any featured DIY project.

Little Lakeview Conservatory, LLC

Please feel free to contact us at LittleLakeviewConservatory@gmail.com be added to our email list or with any questions, requests and comments.

Little Lakeview Conservatory, LLC * Grow a little!

Menu